|
| COOKIE BAKING TIPS AND TECHNIQUES |
Storing Cookie Dough
Cookie dough can be covered and refrigerated for up to 24 hours before baking. If it's too firm, let stand at room temperature
for 30 minutes.
Cookie dough can be frozen in an airtight container for up to 9 months. Thaw just until soft enough to handle.
To freeze refrigerator cookie dough, wrap rolls of dough in aluminum foil or freezerproof wrap.
Storing Baked Cookies & Bars For Crisp Cookies
In a dry climate, keep cookies crisp by storing them in a loosely covered container, such as a cookie jar without a snug
lid. In a damp, humid climate, store in a tightly covered container.
Allow frosted or decorated cookies to harden or become set before storing. Store them between layers of waxed paper, plastic
wrap or aluminum foil.
Storing Baked Cookies & Bars For Crisp Cookies
If cookies soften, heat them on a cookie sheet at 300ºF for 3 to 5 minutes to recrisp.
Storing Baked Cookies & Bars For Chewy Cookies
Keep cookies chewy and soft by storing them tightly covered. Resealable plastic bags, plastic food containers with tight-fitting
lids and metal tins work best.
Allow frosted or decorated cookies to harden or become set before storing. Store them between layers of waxed paper, plastic
wrap or aluminum foil.
Storing Baked Cookies & Bars More Storing Tips
To keep cookies longer, wrap tightly, label and freeze up to 6 months.
Do not mix crisp and chewy or soft cookies together in the same container; the crisp cookies will become soft.
Store different flavors and varieties of cookies in separate containers.
Most brownies and bars can be stored tightly covered at room temperature, but check the recipe to be sure. Some may need
to be stored loosely covered or in the refrigerator.
Meringue, custard-filled or cream-filled cookies don't freeze well; the meringues become tough and the fillings become
watery.
Choosing & Preparing Pans for Cookies
Here's where you'll learn there's more to cookie success than mixing the dough. You also need to bake those cookies with
care. Cookie Sheets
Use shiny, heavy aluminum or gray, nonstick-coated cookie sheets for evenly browned cookies.
Cookie sheets should be a least 2 inches smaller than the inside of your oven to allow the heat to circulate around the
cookie sheets.
If you bake cookies often, have at least 3 or 4 cookie sheets, so as you bake 1 sheet, you can get another one ready to
go.
Square pans--and smaller rectangular pans--come in several sizes and can make choosing a bake time confusing. Measure
pans carefully for size, and use the bake time for the closest pan size. And always follow the doneness test for the recipe
or mix.
Shiny aluminum or gray, nonstick-coated metal pans are preferred for baking bars. Because heat is reflected, these pans
prevent the crust from getting too brown and hard.Baking Pans for Bars
Bars baked in pans that are too big can become hard and overcooked.
Bars baked in pans that are too small can be doughy in the center and hard on the edges. To Grease or Not to Grease
Grease cookie sheets and baking pans only if a recipe specifies to. When greasing cookie sheets, use shortening or cooking
spray. Regrease cookie sheets if cookies begin to stick during baking.
We don't recommend using butter, margarine or vegetable oil for greasing. The area between the cookies will burn during
baking and will be almost impossible to clean.
Don't grease nonstick cookie sheets even if a recipe calls for greasing; the cookies may spread too much. But do grease
nonstick pans when baking brownies.
Cooking parchment paper can replace greasing. It's found in grocery stores near the aluminum foil or in the baking ingredient
aisle. When using parchment paper, just tear off the length of paper you need to cover your cookie sheet and place it curled
side down on the cookie sheet.
In a hurry? Just slide the baked cookies along with the parchment paper off the cookie sheet onto the cooling rack. In
no time, you'll have a cooled cookie sheet ready for the next batch. Have more baking to do than pans? Line baking pans with
aluminum foil for super-quick cleanup and to help cut brownies and bars evenly. When the brownies are cool or nearly cool,
just lift them out of the pan, peel back the foil and cut. Your baking pan will be free for the next batch.
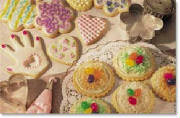
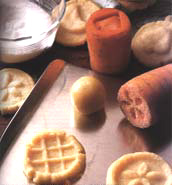
Making Rolled Cookies
People feel very special when you make rolled cookies for them
To prevent sticking, dust the rolling surface and rolling pin with flour, or you can use powdered sugar.
A pastry cloth helps prevent sticking, too. Or you can roll dough between 2 pieces of waxed paper or cooking parchment
paper.
Roll only part of the chilled dough at a time, keeping the remaining dough refrigerated.
Roll dough to an even thickness by rolling over wooden dowels or rulers. For step-by-step help to roll cookies, see How
to Roll Sugar Cookies
Cut cookies with a cutter dipped into flour or powdered sugar-baking cocoa for chocolate doughs--as close together as possible
on rolled dough to avoid re-rolling (re-rolled dough will be a little tougher).
Lift cookies to a cookie sheet with a wide metal spatula that's at least as wide as the cookie so the cookie doesn't lose
its shape.
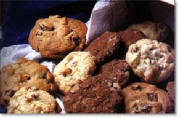
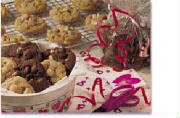
Making Drop Cookies
Nothing's more delicious than warm-from-the-oven, all-American chocolate chip cookies! A few reminders to make yours perfect!
You may want to use an electric mixer to mix the sugars, fats and liquids together. Air incorporated into the fat acts
like a leavening. Then just stir in the dry ingredients by hand. Too much mixing, especially if you have a heavy-duty electric
mixer, will make cookies tough.
Use 2 tableware spoons to drop dough onto a cookie sheet. Scoop dough with 1 spoon, then push onto cookie sheet with the
other spoon.
Or use a spring-handled ice-cream scoop to drop the dough
Drop dough about 2 inches apart (or as directed in the recipe) onto a cookie sheet to prevent cookies from baking together
when dough spreads
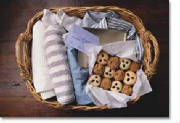
Mailing Cookie Care Packages
Getting a package of cookies--or quick breads--can make the day for a hardworking college student, out-of-town grandparents
or busy young family. Give it a try with these easy tips.
Choose sturdy, unfrosted cookies and bars for mailing. Drop cookies and other hearty cookies in simple shapes are almost
always good travelers, too.
Wrap cookies in pairs--back to back--and place them flat or end to end in a can, box or other durable container.
Fill each container as full as practical, padding the top with crushed waxed paper to prevent shaking and breaking.
Bake and send bars in disposable aluminum foil pans, enclosing a plastic knife for cutting.
Pack containers in a sturdy packing box (line it with aluminum foil if you want to be sure packing materials and cookies
don't pick up moisture or odors while in the mail). For fill, use crumbled newspapers, shredded paper or shredded polyethylene
foam. Be sure to pack several inches of fill in the bottom of the packing box and between items so the cookies cannot move
easily.
Seal and label the package "Perishable" to encourage careful handling.
Send the package so that it arrives in just a few days. It's expensive, but you won't want hard work to get stale

|
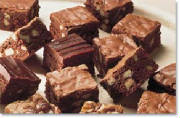
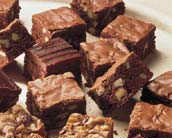
| Brownie & Bar Baking Tips |
Making the Best Brownies & Bars
Use the pan size called for in a recipe. Brownies made in a too-large pan will be overbaked; those in a too-small pan will
be underbaked.
No choice about the pans you use? If it's larger than called for, use a shorter bake time. If it's smaller than called
for, use a longer bake time and reduce the oven temperature 25°F.
For easier cutting, cool brownies and bars completely and use a plastic knife or table knife.
Lemon Bars can be made a day ahead and refrigerated before cutting--they even have better flavor when chilled! You can
moisten the knife if Lemon Bars tear.
Choosing & Preparing Pans for Brownies
Here's where you'll learn there's more to cookie success than mixing the dough. You also need to bake those cookies with
care
Square pans--and smaller rectangular pans--come in several sizes and can make choosing a bake time confusing. Measure pans
carefully for size, and use the bake time for the closest pan size. And always follow the doneness test for the recipe or
mix.
Shiny aluminum or gray, nonstick-coated metal pans are preferred for baking bars. Because heat is reflected, these pans
prevent the crust from getting too brown and hard.
Bars baked in pans that are too big can become hard and overcooked.
Bars baked in pans that are too small can be doughy in the center and hard on the edges.
Grease cookie sheets and baking pans only if a recipe specifies to. When greasing cookie sheets, use shortening or cooking
spray. Regrease cookie sheets if cookies begin to stick during baking.
We don't recommend using butter, margarine or vegetable oil for greasing. The area between the cookies will burn during
baking and will be almost impossible to clean.
Don't grease nonstick cookie sheets even if a recipe calls for greasing; the cookies may spread too much. But do grease
nonstick pans when baking brownies.
Cooking parchment paper can replace greasing. It's found in grocery stores near the aluminum foil or in the baking ingredient
aisle. When using parchment paper, just tear off the length of paper you need to cover your cookie sheet and place it curled
side down on the cookie sheet.
In a hurry? Just slide the baked cookies along with the parchment paper off the cookie sheet onto the cooling rack. In
no time, you'll have a cooled cookie sheet ready for the next batch.
Have more baking to do than pans? Line baking pans with aluminum foil for super-quick cleanup and to help cut brownies
and bars evenly. When the brownies are cool or nearly cool, just lift them out of the pan, peel back the foil and cut. Your
baking pan will be free for the next batch.
Making Brownies
Baking step-by-step is all it takes for the best cookies, bars and brownies. You'll be proud of your results and want to
share the cookies you've made with all your family and friends
Heat your oven. This usually takes about 10 minutes.
Bake brownies and bars in the size of pan called for in a recipe. Bars baked in a pan that is too large will overbake and
be hard. Bars baked in a pan that is too small can be doughy in the center and hard on the edges.
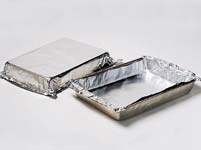
Pans, How to Line with Foil
Turn pan upside down. Tear off a piece of aluminum foil longer than the pan, and shape the foil over the pan. Carefully
remove the foil and set aside. Flip the pan over and gently fit the shaped foil into the pan

|
| Cake Baking Tips & Techniques |

Choosing & Preparing Pans for Cakes
There's more to cake success than mixing the batter. You also need to bake cakes with care.
Use the size of pan called for in a recipe or on the package of mix. How do you know the size of a pan? Measure across
the top from inside rim to inside rim; then place the ruler inside the pan to measure the depth. If the pan's too big, your
cake will be flat and dry; too small and it'll bulge or overflow the pan.
Shiny aluminum or gray, nonstick-coated metal pans are the first choice for baking cakes. They reflect heat away from the
cake for a tender, light brown crust.
A correctly prepared cake pan keeps the cake from sticking. When making most scratch cakes, grease the side and bottom
of the pans and dust each with about 1 tablespoon flour, tapping out excess (check your recipe). Fill cake pans half full.
To determine how much batter a specialty pan (such as a heart, star or bell shape) can hold, fill it with water, then measure
the water; use half that amount of batter. Extra batter? Make cupcakes
Storing & Freezing Baked Cakes
You really can win the time game! Here are some tips our consumers find most useful.Storing Baked Cakes
Refrigerate cakes with custard or whipped cream fillings or toppings (this type of cake does not freeze well).
Loosely cover frosted cakes and store up to 2 days at room temperature, or tightly cover and refrigerate up to 1 week.
Cool unfrosted cakes completely before covering and storing to keep the top from becoming sticky.
Serve a cake with fluffy frosting the same day you make it. Put cakes containing very moist ingredients, such as apples,
bananas, carrots, pumpkin or zucchini in the fridge during humid weather or in humid climates. If stored at room temp, these
cakes tend to mold quickly.
To keep an angel food-type cake fresh overnight, leave it in the baking pan and cover it loosely with plastic wrap. To
maintain freshness after removing the cake from the pan, store it in an airtight container. Freezing Baked Cakes
When making ahead or when freezing leftovers, tightly cover unfrosted or frosted cake and freeze for up to 2 months.
Loosen wrap on frozen unfrosted cakes, and thaw at room temperature 2 to 3 hours. Loosen wrap on frozen frosted cakes,
and thaw overnight in the fridge.
Baking Layer Cakes
These are the cakes--and tortes--that memories are made of. Can't you just hear the "aahs" from family and friends when
they see what you've baked for them?
Before heating the oven, check to see how layer cake pans will fit on an oven rack. Some of our layer cake recipes use
3 round baking pans. Stagger the pans on the rack in the middle of the cold oven. Having 1 inch between pans and between the
pans and the sides of the oven is ideal, and the oven door should close completely.
What if 3 pans don't fit or you have only 2 layer pans? Just cover and refrigerate batter in the third pan or in the mixing
bowl while first 2 layers are baking. If you have 2 pans, remove baked cakes from pans and cool one pan before baking the
remaining batter. An extra minute or two for baking may be needed.
A correctly prepared cake pan keeps the cake from sticking. For Betty's SuperMoist® cake mixes, generously grease the bottom
only of pans (or lightly spray bottom with cooking spray). Use about 1 tablespoon shortening per round cake pan. When making
most scratch cakes, grease the side and bottom of the pans and dust each with about 1 tablespoon flour, tapping out excess
(check your recipe). For nonstick pans, follow the manufacturer's directions; greasing is usually recommended
Cooking spray can be used, but the cake may be less attractive with high sides and a lip. If using, spray it on only the
bottom of the pan; do not dust with flour.
Cool layer cakes in their pans on wire racks for 5 to 10 minutes. This keeps the cake from breaking apart, which it could
if it's too warm and tender.
Cooling a cake right side up on a cooling rack also is helpful. Turn the cake out of the pan onto a rack; top with another
rack, then quickly turn the racks and cake so it cools right side up.
Baking Cupcakes
Make a batch of cupcakes from any of our cake recipes (for a layer cake or 13x9-inch cake) or cake mixes. You'll get about
24 to 36 cupcakes.
Line medium muffin cups, 2 1/2x1 1/4 inches, with paper baking cups. Look for cups in festive colors and special designs
at your supermarket, party store or paper warehouse.
Fill each cup about half full with batter. Bake 20 to 25 minutes or until a toothpick inserted in the center comes out
clean.
If you have only one 12-cup muffin pan, cover and refrigerate the rest of the batter while baking the first batch. Then
bake the rest of the batter in the cooled muffin pan, adding 1 or 2 minutes to the bake time.
Baking Cut-Up Cakes
With these cakes, you'll be so creative. And there's a cake idea for just about every occasion and holiday. You may think
following these tips will take more time, but it'll be time well spent because frosting and decorating will be easier!
Follow the recipe carefully.
Use the pan sizes called for because the sizes will affect how the cut pieces fit together.
Get the cake good and cold before cutting the pieces. Refrigerate for at least 2 hours or overnight. A cold cake is less
tender so it's less crumbly.
You may want to "crumb coat" the exposed cut edges before frosting to help control crumbling. To do this, mix water, a
teaspoon at a time, into a small amount of frosting to make a thin frosting. Spread a smooth, thin layer onto cut surfaces;
freeze about 30 minutes.
Even if you decide not to "crumb coat" the cake pieces, they'll still be easier to handle if you freeze them on a cookie
sheet for 30 minutes to an hour before frosting.
Cover frosting with plastic wrap while using it to keep it from forming a crust and becoming dry.

|
| Pie Baking Tips & Techniques |
Making Pastry for Pies
Here's all you need to know to stir up, roll out, shap the edge and put a beautiful finish on that upper crust!Mixing &
Rolling Pastry
A pastry blender makes easy work of cutting the shortening into the flour. If you don't have one, use 2 knives: With the
blades almost touching, move the knives back and forth in opposite directions in a parallel cutting motion. The side of a
fork or a wire whisk works, too.Easy does it. If you mix too much once the water is added, the pastry will be tough. Make
pastry ahead to make rolling it easier. After shaping pastry dough into a flattened round, wrap it tightly and refrigerate
for at least 15 minutes or even overnight. This break lets the shortening solidify, the flour's gluten relax and the moisture
absorb evenly.
For a shiny top crust, brush the crust lightly with milk before baking.
For a sugary top crust, moisten the crust lightly with water or milk, then sprinkle with a little sugar before baking.
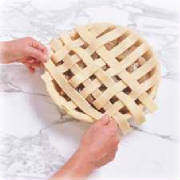
Shaping Pie Edged & Finishing the Top Crust To glaze a top crust, brush the crust lightly with beaten egg yolk that's
been mixed with a little milk before baking.
To glaze a top crust, brush the crust lightly with beaten egg yolk that's been mixed with a little milk before baking.
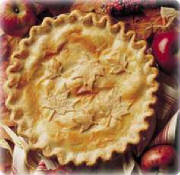
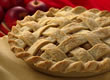
Making Fruit Pies
Nothing's more delicious than warm-from-the-oven, all-American apple pie--unless it's peach or blueberry or cherry! A few
reminders to make yours perfect
It seems there's a variety of apple for nearly every letter of the alphabet, from Beacon (sweet and mealy) to York Imperial
(slightly tart and crisp).
Also look at the supermarket because some display information near the apples-- especially near locally grown varieties--explains
whether the apple is best for baking, cooking or eating.
Some bakers mix apple varieties in a single pie, combining tart with sweet or crisp with mealy. This is a great way to
personalize a recipe, but perfecting takes a bit of trial and error.
Because apples shrink quite a bit during baking, a pie may have a gap between the apples and the crust. Using tart, firm
apples helps, layering so there isn't too much space between them. Making larger holes in the top crust also helps.
You can cut the baking time of an apple pie in half by using a microwavable pie plate. Microwave your unbaked pie uncovered
on High 12 to 14 minutes or until the filling begins to bubble through the slits in the crust. Then transfer the pie to a
conventional oven (don't preheat), and bake at 450°F for 12 to 18 minutes or until the crust is brown and flaky.
When berries are plentiful, nothing's better than baking them in a pie. Although Betty's recipes nearly always give tips
for using frozen fruit that's available year-round, using frozen fruit just isn't the same as coming home from the farmers'
market or roadside stand with baskets of locally grown berries to fill a pastry you've made yourself.
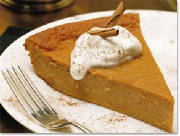
Making Custard & Cream Pies
One difficulty that occurs when baking a pumpkin or sweet potato pie is that the crust rises up during baking. To prevent
this, be sure to carefully ease the pastry circle you've rolled into the pie plate, then make sure no air is trapped between
the pastry and plate. Also check that there's no hole or tear in the crust that will allow unbaked filling to soak through
the crust and cause it to rise.
If your baked pumpkin or sweet potato pie separates from the crust or develops a split in the center, it's a sign that
the pie was baked too long or at too high a temperature. Test for doneness 1 inch from the edge using a knife; the knife should
come out clean.
Baking Pies & Pastry
Pies are baked at higher temperatures (375°F to 425°F) than cakes bake at, so the rich pastry dries and becomes flaky and
golden brown and the filling cooks all the way through.
To keep pie crust and pastry edges from getting too brown, you can shield them with aluminum foil. Remove the foil 15 minutes
before baking is finished so the edges can brown.
For an unfilled one-crust pie crust, always prick the pastry thoroughly with a fork before baking. The steam created in
baking can escape through the holes so the crust won't puff up and leave no room to add the filling!
For one-crust pies that bake the filling in the shell, such as pumpkin and pecan pies, don't prick the crust. If you do,
the filling will seep under the crust during baking.
Storing & Freezing Pies & Pastry
You really can win the time game! Here are some tips our home bakers find most useful
Keep pies that contain eggs, such as pumpkin and cream pies, in the fridge.
Otherwise, you can keep a fruit pie at room temperature for 2 days; after that, store it loosely covered in the fridge
up to 2 days longer. In warm climates, always store fruit pies in the fridge.
You can freeze either unbaked or baked pie crust. An unbaked crust will keep for 2 months in the freezer, a baked crust
for 4 months.
Don't thaw unbaked crusts; bake them right after taking them out of the freezer.
To thaw a baked pie crust, unwrap and let stand at room temperature, or heat in the oven at 350°F for about 6 minutes.
Tuck away a fruit pie by freezing for later! For best results, the pie should be baked first. Then put it, uncovered, in
the freezer. When it's completely frozen, wrap the pie tightly or put it in a plastic freezer bag and pop it back in the freezer.
Frozen baked fruit pies will keep up to 4 months.
To serve a frozen 2-crust pie, unwrap it and thaw at room temperature for 1 hour. Then heat the pie in the oven at 375°F
on the lowest rack for 35 to 40 minutes or until warm.
If, however, you want to freeze pies unbaked, wrap and freeze the pie the same as a baked one. Don't cut slits in the top
crust yet. Unbaked fruit pies will keep in the freezer up to 3 months. When you're ready to bake, unwrap and carefully cut
slits in the still-frozen top crust. Do not thaw. Bake at 425°F for 15 minutes, then reduce the heat to 375°F and bake 30
to 45 minutes longer or until crust is golden brown and juice begins to bubble through the slits.
Custard and cream pies don't freeze successfully

Baking All-American Fruit Desserts
Remember when you helped pick apples or raspberries or peaches, then watched as an aunt or a neighbor turned them into
apple-raspberry crisp or peach cobbler? What a memory! And what a great idea to carry on the tradition of baking these simply
delicious desserts with your child.
Look at the supermarket because some display information near the apples--especially near locally grown varieties--explains
whether the apple is best for baking, cooking or eating.
Peaches and plums are plentiful in summer, pears in late summer and through the fall.
When berries are plentiful, nothing's better than baking them in a classic fruit dessert. Although Betty's recipes nearly
always give tips for using frozen fruit that's available year-round, using frozen fruit just isn't the same as coming home
from the farmers' market or roadside stand with baskets of locally grown berries to fill a pastry you've made yourself.
You'll need a casserole dish, either heatproof glass or ceramic, for making crisps and cobblers.
The secret to a biscuit topping that's cooked all the way through is having the fruit good and hot before adding the topping
and then baking.
Cobblers and crisps are best served the same day you make them.
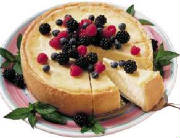
Baking Extraordinary Cheesecakes
With relatively few ingredients, turning out a lovely cheesecake doesn't take much time or trouble. But until you've made
a few, producing a perfectly formed example can pose a challenge.
If you bake cheesecakes often, you'll benefit from using a springform pan.
Mix for the time and speed given in a recipe. Overbeating, including mixing at too high a speed, incorporates too much
air, which can make a cheesecake collapse.
Many recipes have you add moisture during baking to help keep a cheesecake from cracking. To do this, place a shallow pan
of hot water on the bottom oven rack during baking.
Recipe directions may also warn you to not "peek" at a cheesecake until it nears the end of baking. Cheesecakes can crack
from a sudden shock of cold air.
Cheesecakes are baked at lower temperatures than regular cakes to keep them from shrinking.
How can you tell if cheesecake is done? Either touch the top lightly or gently shake the pan. The center may be just firm
to your touch or jiggle slightly, but it will set during chilling.
Poking the tip of a knife in the cheesecake to test doneness isn't advised because the hole could cause it to crack.
After the Cheesecake is BakedFirst, let the cheesecake cool at room temperature for 30 minutes or as directed in the recipe
before you put it in the fridge.
Second, refrigerate it uncovered for 2 to 3 hours or until chilled before you serve it. If you cover the warm cheesecake
right away, moisture may condense and drip onto the cheesecake top.
Third, after chilling, cover the cheesecake so that it doesn't dry out or pick up odors from other foods, and keep it in
the fridge.
For cheesecakes with side crusts, run a metal spatula along the side to loosen it from the pan; do this after baking and
after refrigerating. Otherwise, the cheesecake could pull away from the crust as it cools.
To cut, first dip the knife into water, and clean it off after every cut. Or use a piece of dental floss! Holding a length
of dental floss taut between your hands, pull the floss down through the cheesecake, making a clean cut.
Baking & Baking Meringue
Meringue, a froth of egg white, sugar and air, can make a melt-in-your-mouth soft topping for pies or a hard, crispy shell
to cradle cream fillings, fruit or ice cream. We've included tips for making successful meringues every timeMixing Meringue
Pick a cool, dry day to make meringue. If it's humid or rainy, the sugar in the meringue will absorb moisture from the
air and make the meringue sticky and spongy. The meringue also may get beads, or drops, of sugar syrup on the surface.
Start with cold eggs, and separate them very carefully. Cold eggs are easier to separate! Even a speck of yolk in the whites
will keep the whites from achieving the volume needed during beating.
For better volume, let egg whites stand at room temperature for 30 minutes before beating. Egg whites beat up better when
they are not so cold! Or put the whites in a microwavable bowl and microwave uncovered on High for about 10 seconds per egg
white to bring them to room temperature. If you heat them too long, though, they'll cook through
Beat in sugar gradually, about 1 tablespoon at a time, so that your meringue will be smooth and not gritty. Continue beating
until the meringue stands in stiff peaks when you lift the beaters out of the mixture.Soft Meringue for Pies
Spread the meringue over the hot pie filling right up to the crust so it "seals." When it's sealed, it won't shrink or
weep or ooze liquid after baking.
With a table knife or metal spatula, swirl the meringue into points to make it look pretty.Once it's baked, make sure the
pie cools away from drafts, so don't put it near a door or window. This can cause the meringue to shrink as it cools. Hard
Meringue Shells for Desserts
A meringue shell should be thoroughly dry and crisp after baking. If not baked long enough, it will become limp and gummy.
Cool meringue shells in the oven-with the heat turned off-for as long as the recipe suggests.
To keep them crisp, store tightly covered.
Meringue shells are usually filled just before serving so they don't absorb moisture and become chewy
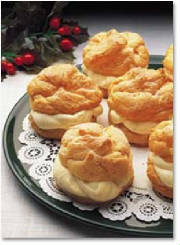
Baking Cream Puffs
Cream puff pastry is used to create airy cream puffs--and other desserts with French names, including èclairs and profiteroles.
Here's one of Betty's secrets: Keep some cream puffs tucked away in the freezer for a last-minute company dessert
Making cream puff dough starts on top of the stove. Heat water and butter to boiling, then stir in flour all at once. You
need to keep stirring vigorously over low heat until the mixture leaves the side of the pan and forms a ball. This takes about
a minute. This step cooks the flour, which is needed for cream puffs that "puff."
Next, beat in eggs. The pastelike mixture that results should spoon out onto a cookie sheet without flattening.
Steam is the "leavening" in cream puffs, which is the reason for using a higher baking temperature (400°F). The steam that
"puffs" cream puffs is similar to the steam that "pops" popovers.
Before serving cream puffs, cut them open and pull out any strands of soft dough.
Yummy fillings for cream puffs include whipped cream, ice cream and puddings.
Store filled cream puffs in the fridge, and serve within 2 hours of preparing. If stored longer, the cream puff shell gets
soggy.
Filled cream puffs don't freeze successfully.
Unfilled cream puffs can be stored in the fridge for several days; you'll first want to cut them open and remove the strands
of dough to prevent sogginess.
To freeze unfilled cream puffs, wrap tightly in moistureproof wrap or resealable plastic food-storage bags, label and freeze
up to 3 months. There's no need to cut cream puffs open or remove the strands of dough before freezing. Thaw at room temperature.
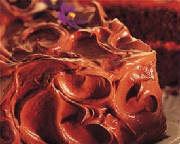
Working with Chocolate
Many of us have a passion for chocolate, and it's no different in Betty's Kitchens. Here are some tips and techniques for
working with chocolate, as well as our most delicious and indulgent chocolate recipes that will tell your family they're specialKeeping
It Cool
Store in a dry, cool place between 60°F and 78°F. Wrapping chocolate in moisture-proof wrap is wise if the temperature
is higher or the humidity is above 50 percent.
Chocolate can be stored in the fridge; let it stand at room temperature before using.
Cocoa is less sensitive to temperature and humidity; simply store tightly covered in a cool, dry place. That Blooming Chocolate
If your chocolate has a white, crusty-looking film on it, don't toss it out!
This is called "bloom" and develops when the chocolate is exposed to varying temperatures, from hot to cold.
This change in heat allows the cocoa butter to melt and rise to the surface of the chocolate.
Bloom doesn't affect the quality or flavor. The chocolate will look normal again once it's melted or used in baking. The
Great Meltdown
Chocolate must be melted carefully because it can burn easily. Never heat dark chocolate above 120°F or white or milk chocolate
above 110°F. Be sure to break up or chop chocolate bars or squares before melting.
To melt most types of chocolate, microwave uncovered in a microwavable dish or bowl on Medium (50%), stirring once every
minute, just until melted. Some chocolate retains its shape when softened, so stir it frequently.
Take care to never get water in chocolate while it's melting. If this happens, the chocolate will get thick, lumpy and
sometimes grainy--it's called "seizing." You'll think it's ruined.
Seized chocolate can be "saved" by stirring in 1 teaspoon vegetable oil or shortening for every ounce of chocolate melted.
(Don't use butter or margarine because they contain water.) "Speck"tacular Chocolate
Little specks of hardened chocolate can appear when you are stirring melted chocolate into other ingredients.
To keep this from happening, melt the chocolate with the liquid or fat that is also called for in the recipe. If you use
at least 1 tablespoon of liquid or fat to 2 ounces of chocolate, you will avoid the risk of the chocolate seizing.
Also, never stir cooled melted chocolate into ice-cold ingredients because the cocoa butter will harden immediately.

|
| Muffin & Bread Tips & Techniques |
Baking Muffins
What's better than a blueberry muffin on Saturday morning? Or what's a nicer less-sweet snack than muffins for your kids
after school? Plus making them is just about the easiest way to learn to bake!
Use shiny muffin pans for golden and tender muffin crusts.
For nicely shaped muffins with rounded tops and no "edges with ledges," most recipes have you grease only the bottoms of
the muffin cups with shortening.
For easy baking and easy cleanup, use paper baking cups.
Measure with care. If you don't, a coarse or crumbly texture and dryness can be the result.
The batter should be lumpy after you stir the dry ingredients into the wet ingredients. If you mix the batter too much,
muffins can be tough with "peaked" tops and holes or tunnels inside. Take the guesswork out of filling muffin cups by using
a spring-handled ice-cream scoop! Scoops marked with a No. 20 or 24 get most muffin cups about 3/4 full--the amount you need
for the rounded tops you want.
End up with empty cups in your pan? If you've greased them, fill the empty ones half full with water. It keeps the grease
from burning and all the cups will bake more evenly.
When muffins are done, take them out of the muffin pan immediately so they don't get soggy. If you need to, loosen them
with a table knife, then lift them out. If a recipe has you leave the muffins in the pan for a few minutes after baking, those
muffins are more fragile and need to be set up a bit so you can remove them easily.
Muffins baked in paper cups should lift right out.
Serve muffins while they're good and hot!

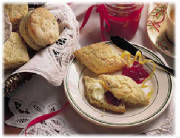
Baking Flaky Biscuits & Scones
If any breads deserve the name "quick," it's the all-American biscuit and its English cousin, scones. Not only can you
make them in a jiffy but handling the dough also calls for a quick, light touch
Heat your oven. This usually takes about 10 minutes.
Check that ingredients are fresh. Shortening or leavening that is out of date won't give you the best-tasting or highest-volume
biscuits.
Measure with care. If you don't, a coarse or crumbly texture and biscuits that don't rise can be the result.
One secret is to properly combine, or "cut in," the right amount of shortening and flour. If there's not enough shortening
to flour, the "cutting in" process won't set up the flaky layers as biscuits bake.
A pastry blender works great for cutting in shortening. If you don't have one, you can crisscross 2 table knives through
the flour and shortening or use a wire whisk.
For nice-looking biscuits and even baking, roll or pat the dough without a lot of handling to an even thickness. Too much
handling with too much flour gives you biscuits that are tough and dry.
If you make a lot of biscuits, here's a clever trick: Use 2 sticks, 1/2 inch thick and 14 inches long, to get the same
thickness every time. Place the ball of dough between the sticks, and roll or pat the dough to the thickness of the sticks.
Use a biscuit cutter dipped in flour to cut the dough, pushing the cutter straight down through the dough. If you twist
as you cut, the biscuits will be uneven.
Cut the biscuits as close together as possible.
After cutting the first round of biscuits, lightly press-not knead-the scraps of dough together. These biscuits will look
slightly uneven.
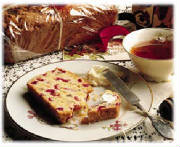
Baking Quick Bread Loaves
Who doesn't let a couple of bananas get a little ripe or have half a bag of cranberries just waiting in the freezer? Turning
those "leftovers" into fragrant quick bread loaves is the easiest and most soul-soothing solution we can suggest.
Choose a pan that's the right size.
For loaves with a gently rounded top and no "lipping" at the edges, grease only the bottoms of the loaf pans.
Measure with care. If you don't, a coarse or crumbly texture and dryness can be the result.
Chop or shred fruits, vegetables or nuts before you start making the batter. If you start the batter and then stop to chop,
the batter may get too stiff.
And hold back on using up extra amounts of fruits or vegetables; the extras can make a loaf heavy and hard to bake all
the way through. It's easy to mix quick breads by hand. Most recipes have no need for an electric mixer.
It's okay if the top of the loaf has a large, lengthwise crack.
Cool quick breads completely before slicing; cutting while warm is one of the chief reasons for crumbling. Even better,
store them tightly covered for 24 hours for easier cutting.
Cut with a sharp, thin-bladed knife, using a light sawing motion.
After cooling, wrap loaves tightly and store them in the fridge for up to a week or freeze up to 3 months
Making Bread Machine Breads Homemade bread is made easier! You'll find lots of variety among Betty's recipes made in bread
machines. Betty's staff loves the ease with which the yeast dough is made-letting them in on the creative step of shaping
the dough into wonderful rolls, free-form loaves and coffee cakes. You'll find lots of variety among Betty's recipes made
in bread machines. Betty's staff loves the ease with which the yeast dough is made-letting them in on the creative step of
shaping the dough into wonderful rolls, free-form loaves and coffee cakes
Read your bread machine manual carefully, especially the tips and hints. Make sure the machine is assembled correctly.
Add ingredients in the order specified by the manufacturer.
Carefully measure ingredients with standard measuring cups and spoons. Even little variations can dramatically affect the
finished loaf.
Ingredients should be at room temp, except for those normally stored in the fridge such as milk, sour cream and eggs.
For best results, use bread machine yeast. It has a finer granulation that helps the yeast disperse more thoroughly during
mixing and kneading. Remember that when the weather is hot and humid, yeast action speeds up; when it's cold out, yeast action
slows down
For high-volume loaves, use bread flour.
Be careful when you peek! Checking the progress of your bread is tempting, but peek only during mixing and kneading. If
you open the machine during rising or baking, the loaf can collapse.
When using the delay cycle, be sure the yeast doesn't come in contact with liquid or wet ingredients. Don't use the delay
cycle with recipes that contain eggs, fresh dairy products (butter and margarine can be used), honey, meats or fresh fruits
and vegetables because bacteria can grow while these ingredients stand in the bread machine for several hours. If you get
the urge to experiment by changing the ingredients, make just one change at a time so you can clearly see the result.
For consistent results, keep your bread machine in the same place, away from drafts and areas of your house where heat
and humidity fluctuate widely. Keep the area around your bread machine open for good ventilation.

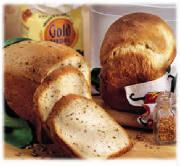
Making Bread with Yeast
You'll find recipes for two types of yeast breads. Also, there are two ways to mix breadsMixing Yeast Bread Dough
The Two Types:
Batter breads are shortcut yeast breads made by mixing-but not kneading-a soft yeast dough. The texture is coarser than
for breads that are kneaded and spread in a pan to give them shape and let rise.
Breads from kneaded dough are shaped into loaves, rolls, coffee cakes and even pizza crusts by both mixing and kneading.
Kneading develops gluten from the protein in flour and results in bread with an even texture and a smooth, rounded top. If
dough isn't kneaded enough, the bread will turn out coarse, heavy, crumbly and dry.Two Ways to Mix:
Most of Betty's recipes follow the "quick-mix" method, meaning the yeast is mixed with part of the flour, then very warm
liquid (120°F to 130°F) is beaten in.
Some recipes, however, turn out better if you use the traditional method of dissolving the yeast in warm water (105°F to
115°F). Kneading Yeast Bread Dough
One way to knead is by hand-the traditional way.
Or use a standard countertop electric mixer with a dough-hook attachment. Bread loaves may have slightly less volume than
those kneaded by hand.
A heavy-duty electric mixer produces loaves with higher volumes. Just follow the manufacturer's instructions for the size
of recipe-usually given in cups of flour-that the mixer can handle, as well as mixing times. Making Bread Dough Rise
Grease a large bowl-bread dough will double in size-with shortening or cooking spray. Add the dough, turning it so all
sides are greased. Cover the bowl with plastic wrap and set in a warm, draft-free place.
Or place the covered bowl on a wire rack over a bowl of hot water.
Or use the microwave: Fill a microwavable measuring cup with water, and microwave until the water boils. Set the covered
bowl of dough in the microwave with the steaming water. It's a nice toasty-warm, humid place, especially if you keep your
home coolFinishing Touches
For a shiny crust, brush the top of the bread with an egg or egg white beaten with a little water. If desired, sprinkle
with poppy, caraway or sesame seed or rolled oats.
For a softer, deep golden brown crust, brush with softened butter or margarine.
For a crisp crust, brush or spray lightly with water.
For a soft, tender crust, brush with milk.
After glazing (brushing with one of these ingredients), slash the top of the loaf with a sharp serrated knife, cutting
about 1/4 inch deep, once down the center of the loaf or across the loaf a few times. Baking Yeast Bread
Adjust the racks before heating the oven.
If baking in pans, stagger the pans so they don't touch the oven sides or each other, and use a lower rack so the top of
each pan is level with or slightly above the middle of the oven.
If baking on a cookie sheet or in a muffin pan, place the sheet or pan on a rack in the center of the oven.
Heat your oven. This usually takes about 10 minutes.
How can you tell if bread is done? Tap the crust. If the loaf sounds hollow, it's done.
Remove loaves from pans immediately so the sides remain crusty, and place them on wire racks away from drafts to cool.
Cutting Bread Loaves
Place loaf on a cutting board or other surface suitable for cutting. Slice with a serrated bread knife or an electric knife.
If bread is very fresh or still warm, turn it on its side to avoid squashing the top.
Try new shapes. Cut round loaves into wedges. Cut slices into fingers, or cross-cut slices into triangles. Cut slices into
fun shapes with cookie cutters.
|